This tutorial describes how to setup a test integration running Dell Boomi. For those not familiar, Boomi is an integration platform as a service that implements many of the integration patterns described in the book Enterprise Integration Patterns. It is a commercial alternative to the Apache Camel open source integration framework.
Boomi Overview
Boomi allows developers to run an integration Process, which is composed of an input stage, followed by data transformations and any business logic, followed by one or more output stages where the data is written out to a final destination.
The defined integration process is executed by Boomi’s workflow engine and messaging infrastructure. The workflow engine sends tasks and data to the Boomi runtime framework, called Atoms, for execution. The Atom executes its assigned work and reports back to the workflow engine with the results, which triggers the next stage in the integration process to run. Or something like that. Boomi is a proprietary platform so some of the details presented here may not be 100% accurate.
Prerequisites
To execute a Boomi integration process requires a Linux server running the Atom runtime to be accessible by the public Internet. Our sample integration process will write data to Amazon S3, and requires the running Linux server to have write permissions to an S3 bucket. The rest of the tutorial assumes you have access to a publicly addressable Linux server that is capable of writing to S3.
Installing the Atom Runtime Framework
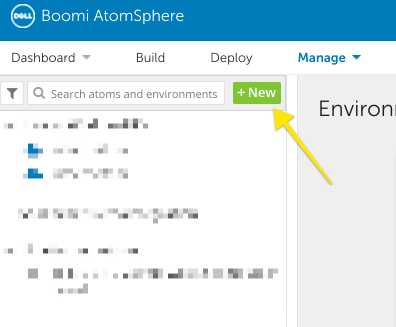
Installing the Atom runtime framework requires downloading the latest installation script from the Boomi Atom Management interface. To do so, log in to your Boomi account and select the Manage dropdown, followed by New.
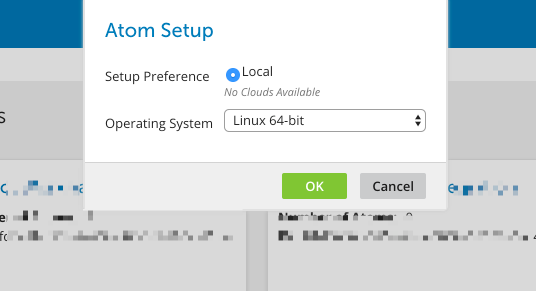
On the next pop-up, select Local, and the appropriate machine type of your server.
This will download the Atom installation script to your desktop. After downloading the installation script, you need to transfer it to your Linux server. This step is implementation dependent, but as an example, if you are running an EC2 ubuntu instance you would use the following steps (or similar)
$ eval $(ssh-agent)
$ ssh-add <my-aws-pem-file>.pem
$ scp atom_install64.sh ubuntu@<my-ec2-instance-public-ip>:/home/ubuntu/
Now that the install script is on our server, we can ssh into the server to run it. The installation requires a Java runtime, so the following set of instructions include the installation of that runtime for an Ubuntu server.
$ ssh ubuntu@<my-ec2-instance-public-ip>
$ sudo apt-get update
$ sudo apt-get install default-jre
$ chmod a+x atom_install64.sh
$ ./atom_install64.sh
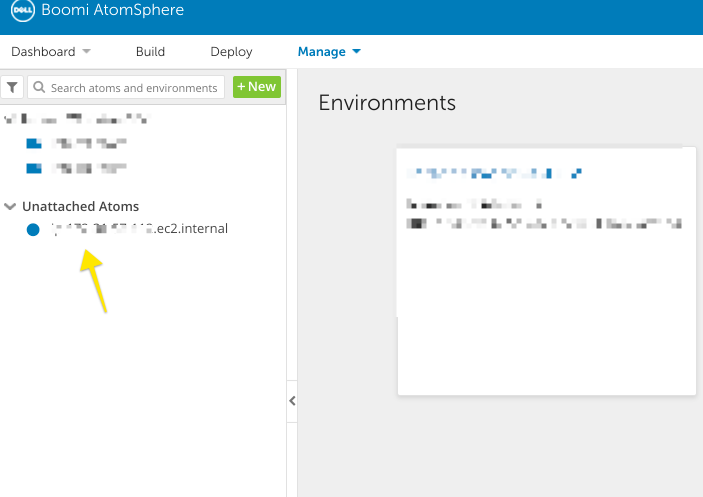
The installer will ask you for your username and password, to configure a name for your Atom, and whether or not this server connects to the public Internet through a proxy. Answer these questions, and follow the remaining prompts to choose an install location for the Atom framework. Once everything is complete, you will see your Atom as available in the Atom cloud management interface.
The Atom log files are available in logs directory under the
installation directory.
/home/ubuntu/Boomi_AtomSphere/Atom/<your-atom-name>/logs
The Integration Process
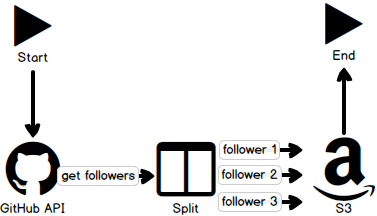
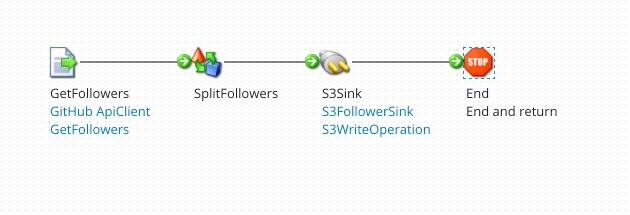
Now that we have an Atom available to execute an integration process, we can create said process. For this tutorial, I will create a contrived integration process using the GitHub REST API to retrieve the list of GitHub users who follow me, split that list into individual documents — one per follower — and write each of those documents to S3. The entire process looks something like the following.
Connectors
Connectors in Boomi provide the input/output functionality of the Boomi platform. Boomi provides some connectors for common sources like Google Apps or SAP. In our case, we will create a new connector using an HTTP client to connect to the GitHub REST API.
Creating an HTTP Client
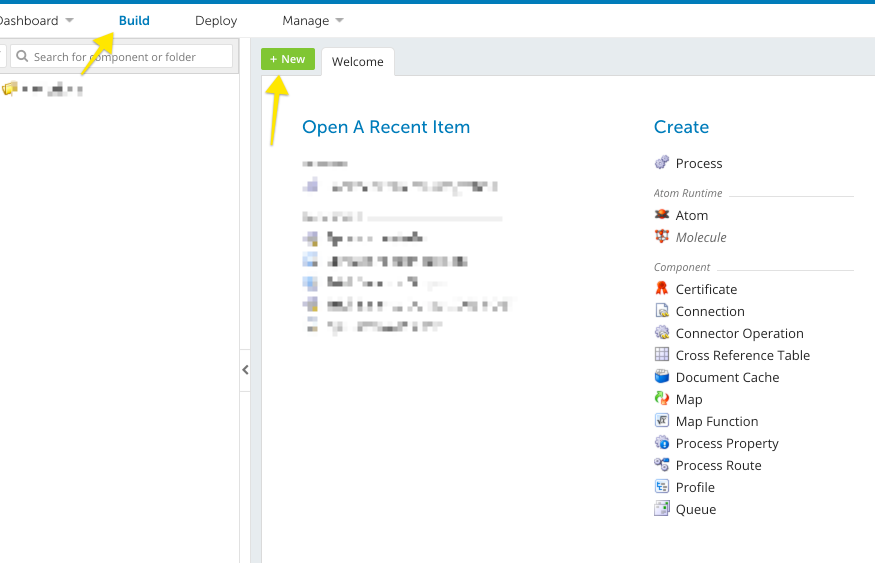
The HTTP Client provides the configuration for subsequent HTTP calls, including any required authorization. An HTTP Client is an instance of an AtomSphere Component. Components are reusable pieces of functionality that are used to define the integration process. To create a new HTTP Client component, select New from the build interface.
Then, select Connection as the component type and HTTP Client as the Connector.
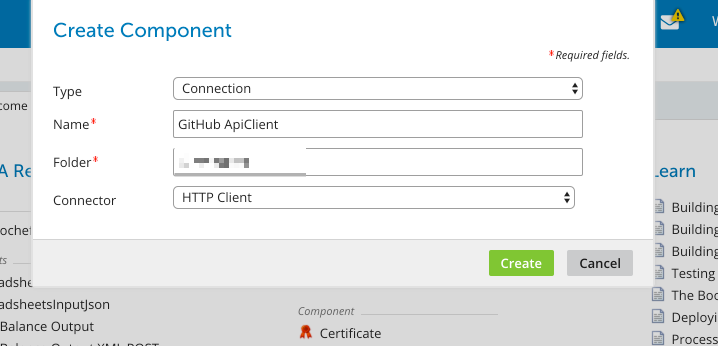
This brings you to the configuration screen. Since the GitHub API does not require authentication for public data, you can configure the HTTP Client to have no Authentication mechanism.

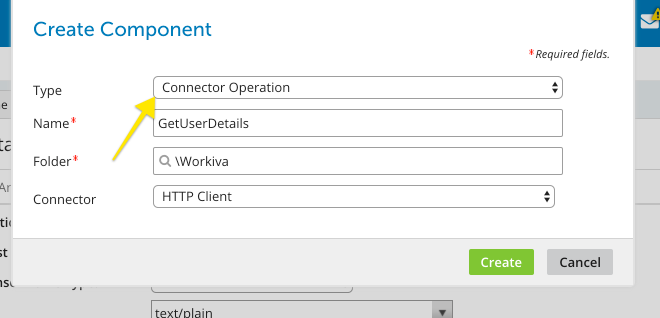
Creating an HTTP Operation
Performing an operation with your client requires creating another
Component. This time, your component is an HTTP Operation that relies on
your HTTP Client. Follow the same steps you took for creating an HTTP
Client, but this time select Connector Operation as the component type.
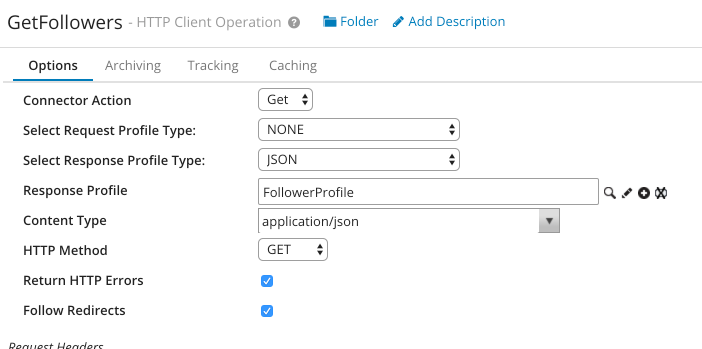
Once you have created the operation, it will take an interface for specifying the HTTP operation by detailing the expected input and output responses and any required parameters. For this tutorial, our sample integration will retrieve my list of GitHub followers. Getting the details of a GitHub user is a simple HTTP GET operation with no additional parameters.
$ curl -i https://api.github.com/users/soofaloofa/followers
HTTP/1.1 200 OK
...
[
  {
    "login": "Milstein",
    "id": 144645,
    "avatar_url": "https://avatars.githubusercontent.com/u/144645?v=3",
    "gravatar_id": "",
    "url": "https://api.github.com/users/Milstein",
    "html_url": "https://github.com/Milstein",
    "followers_url": "https://api.github.com/users/Milstein/followers",
    "following_url": "https://api.github.com/users/Milstein/following{/other_user}",
    "gists_url": "https://api.github.com/users/Milstein/gists{/gist_id}",
    "starred_url": "https://api.github.com/users/Milstein/starred{/owner}{/repo}",
    "subscriptions_url": "https://api.github.com/users/Milstein/subscriptions",
    "organizations_url": "https://api.github.com/users/Milstein/orgs",
    "repos_url": "https://api.github.com/users/Milstein/repos",
    "events_url": "https://api.github.com/users/Milstein/events{/privacy}",
    "received_events_url": "https://api.github.com/users/Milstein/received_events",
    "type": "User",
    "site_admin": false
  },
...
]
The response returns a list of objects, each of which has particular properties. In Boomi, we need to define this expected response type as part of the HTTP Operation.
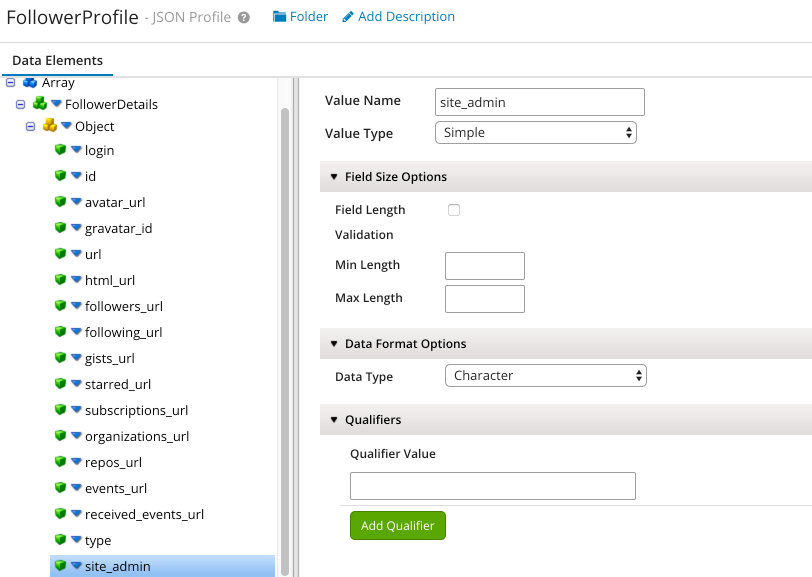
After defining your response profile, you can finish configuration the HTTP Operation for retrieving a users followers
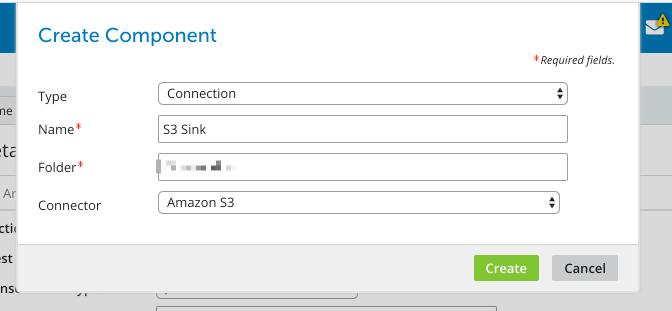
Creating an S3 Connector
The output of our process is to write data to S3, for that, we need to create an S3 connector. The S3 connector is another Boomi component type that is selectable when creating a new component.
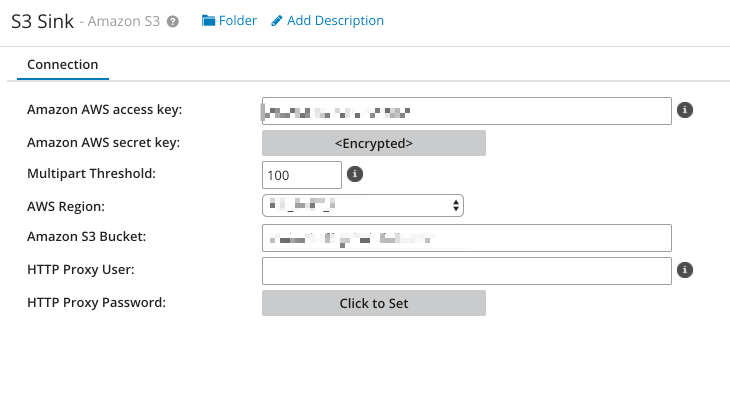
To configure your component, you need to enter your AWS access key and secret, and specify an S3 bucket that the connector writes to or reads from.
Building the Process
We have configured our source and destination connectors, now we can define the actual integration process. To do this, click New and select Process and give your process a name. This presents you with a canvas for visually defining your integration.
By using the UI, you can add the GitHub and S3 data connectors we defined earlier to the process, and define the business process using Shapes.
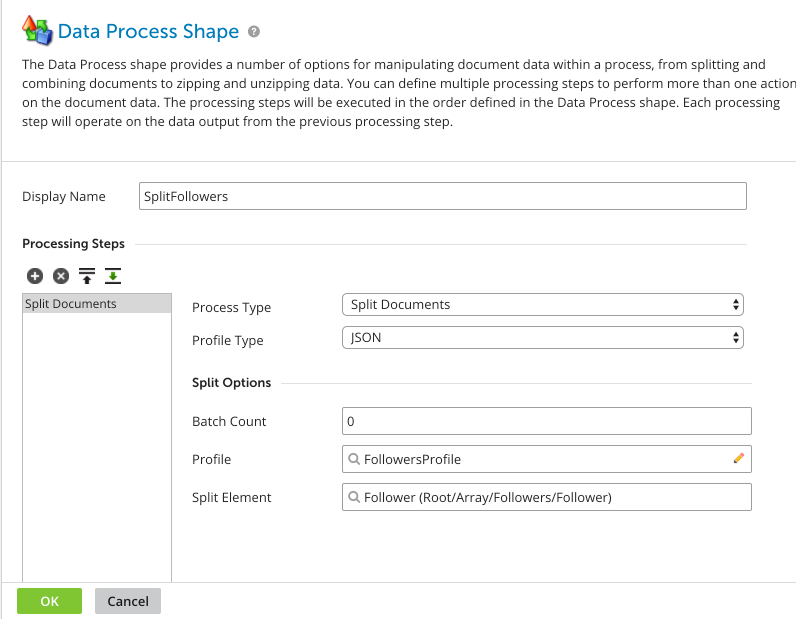
Shapes define the data transformation and manipulation rules that apply to your business process. In our case, we want to take a list of GitHub followers and split that list into individual documents to insert into S3. To do so requires a Data Process shape to be added to our integration process.
By using the UI, you can add a Data Process shape to your integration, and configure it to split the list of followers into individual followers per document, as in the figure below.
The final result for this tutorial should look something like this.
Testing the Process
Testing the process involves clicking on the Test button in your process view, and choosing the Atom that was deployed to your server. By running the test, the Boomi platform will send tasks to your Atom for execution, and your Atom will run those tasks. The results of execution are sent back to the Boomi platform to manage the transition between states in your process.
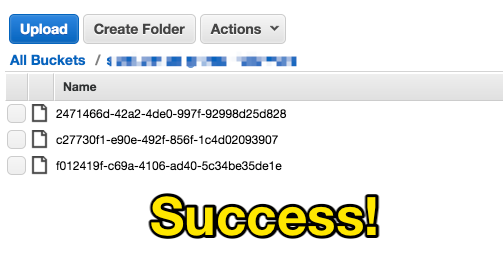
After running the test process, you should see files written to your configured S3 bucket. Each file will contain an individual follower from the list of followers retrieved from GitHub.